This page provides a screenshot tutorial on how to configure Microsoft Outlook 2003 to work with the mailFISH on a Gmail account.
Google's free mail service can be accessed via POP3 and SMTP. After enabling POP3
in your Gmail settings page, POP3 is available at pop.gmail.com,
port 995, with SSL. SMTP is available at
smtp.gmail.com, port 465, with SSL.
As Gmail uses SSL and SMTP authentication it can be considered a rather complex client setup.
This and its popularity are the main reasons why the setup of a Gmail account has been chosen for
this tutorial. If you want to use Microsoft Outlook with the mailFISH POP3/SMTP proxy to
access your mail account, please follow the subsequent steps:
Download and install the mailFISH POP3/SMTP proxy as is described
here.
Follow steps 1-3 of the execution procedure described
here.
Start Microsoft Outlook, and open your E-Mail account settings via
Tools | E-mail Accounts...
Select View or change existing e-mail accounts and click
on Next.
Select the E-Mail account you want to update and click on Change.
In the Incoming mail server (POP3) field replace
pop.gmail.com with localhost.
In the Outgoing mail server (SMTP) field replace
smtp.gmail.com with localhost.
In the User Name field replace
your current user name with your full E-Mail address
(<username>@gmail.com).
When you are done click the More Settings button in the lower
right corner of the account window.
On the Outgoing Server tab select
My outgoing server (SMTP) requires authentication
and tell Outlook to log on using your previous POP3 account settings
(<username> without the E-Mail appendix)
On the Advanced tab disable
This server requires an encrypted connection (SSL)
for both the incoming and the outgoing servier. The port values should then be
110 for POP3 and 25 for
SMTP.
Click Ok to close the Internet E-mail Settings dialog,
Next and Finish
to close the E-mail Accounts dialog.
In Outlook's main window click Send/Receive to try
communication with your mail servers.
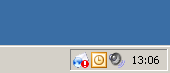
The mailFISH becomes active showing an exclamation mark next to the system tray icon.
Double click it to open the application window.
In the appearing form review and complete your original POP3/SMTP settings. Your
user name is the original Gmail account <username>.
Click Ok when you're done.
In Outlook's main window click Send/Receive to try
communication with your mail servers again. You can now send and receive messages,
not only when a direct connection is available but also when you are behind
a firewall or a restrictive proxy.